
How To Install IndowONE Inserts
CUTTING THE PACKAGING
Carefully cut and remove the cardboard and plastic wrap from your Indow inserts, making sure to not cut into the cardboard itself or jab or slice the acrylic. Use scissors, not box cutters or blades.
NOTE: All cardboard packaging can be recycled.
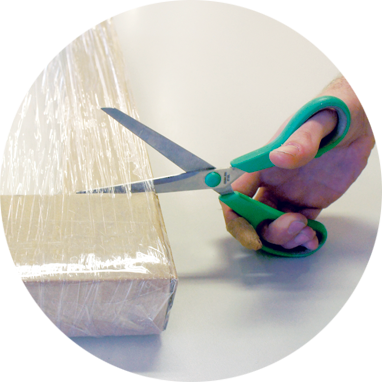
YES
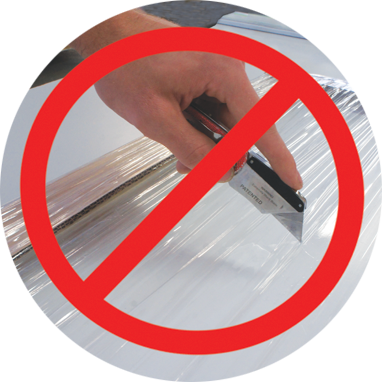
NO
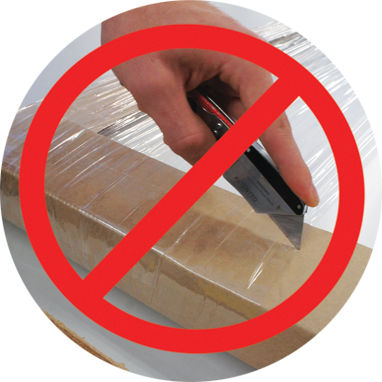
NO
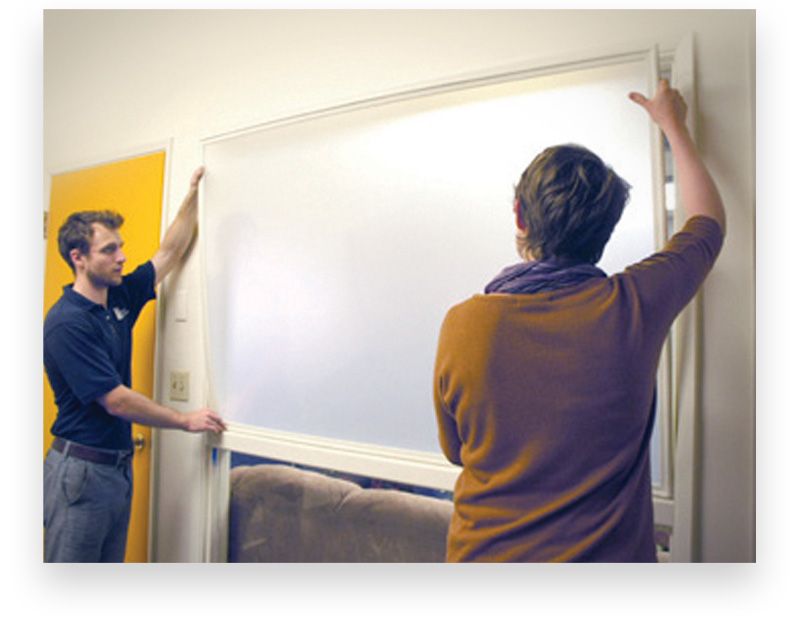
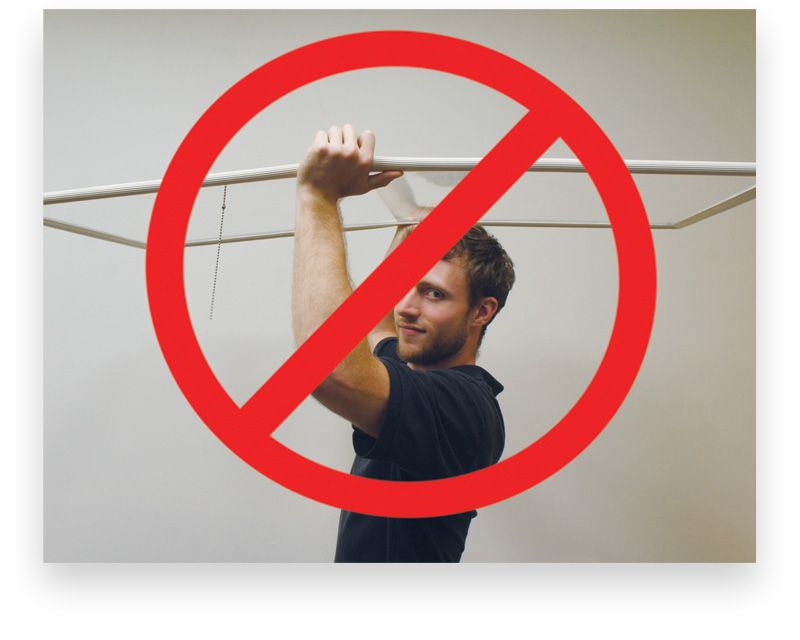
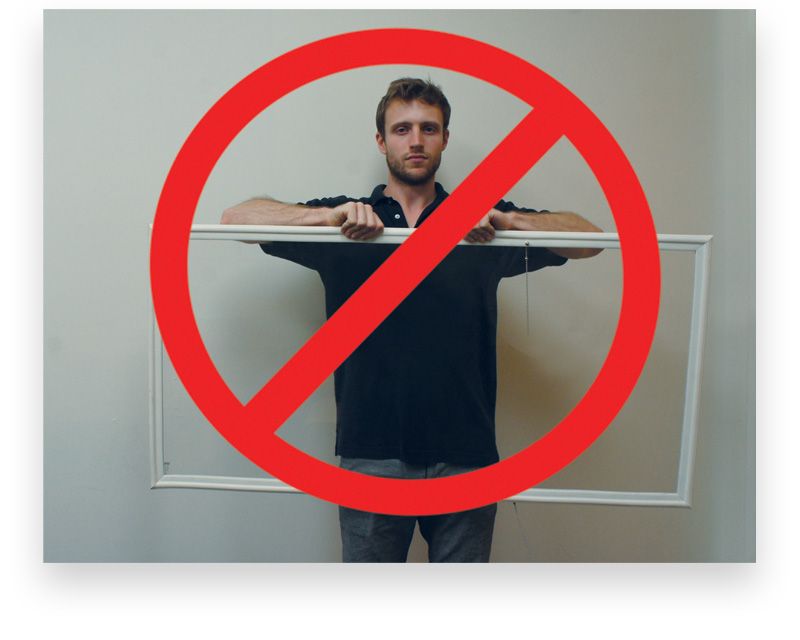
Handling Once Unpacked
Handling Once Unpacked Make sure the Indow insert stays mostly straight, and does not bend or bow. If carrying with two people, hold the insert vertically, perpendicular to floor so panel does not bend/bow.

YES
YES
Do not place hands directly across from each other on a rectangular insert, or carry by holding the compression tube only.
NO
NO
REMOVE PACKAGING
Frame Brackets may be required. Keep an eye out for a small package with an orange label that says “HARDWARE ENCLOSED”. If frame brackets are required they will be in this package along with the Welcome Kit.

TEST FIT & INSTALL HARDWARE
Ensure the Indow insert is paired with the correct opening. You can find the room name and location on the product label AND/OR etched into the back side of the Compression Tube in the lower left-hand corner.
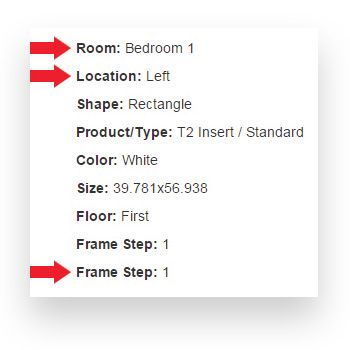
Determine the location for the Indow insert within the frame i.e. 'Frame Step', as noted on the product label.
Test fit the Indow insert to ensure proper fit before peeling THE PROTECTIVE FILM.
NOTE: The insert will be slightly larger than the opening to allow for a compression fit.
Install the safety chain frame brackets in frames (only required for larger inserts if bracket location on product label reads N/A brackets are not required).
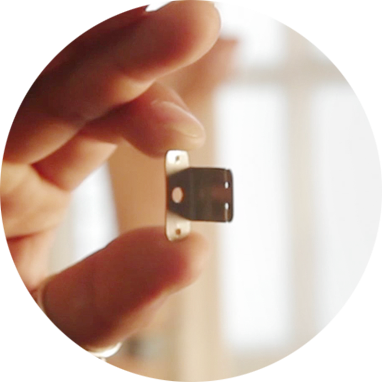
You will be installing TWO brackets – one on each side of the frame.

Measure the noted distance from the bottom of the frame up and mark location with pencil. NOTE: The bracket should be installed immediately behind where the Indow insert will sit in the frame so that it is hidden behind the insert.
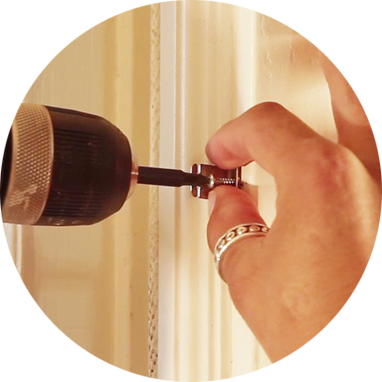
Pre-drill, then install bracket with screw provided. We suggest using a 1/16” drill bit.
Install The Indow Insert
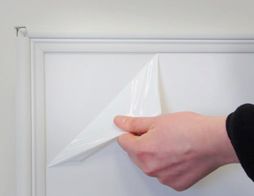
Remove the film from the BACKSIDE (i.e., the side facing toward the existing window). The back of the panel has the insert label, unfinished corners and safety chains, and will face the window glass when installed. Wipe down the backside with the microfiber cloth.
NOTE: When cleaning your Indow inserts, DO NOT USE ANY ammonia, alcohol, or bleach-based cleaners such as Windex, Clorox or 409. Do not use lemon juice or vinegar. Do not use paper towels, newspapers or rough cloths. Use only microfiber cleaning cloths (See Indow Care Guide for more information).

Place the bottom of the insert on your window sill and within the desired frame step. Nudge the bottom of the insert into place and make sure the bottom corners are evenly compressed (i.e. not positioned too far over to the right or left).

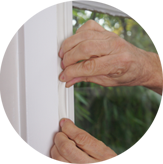
Reach around both sides of the Indow inserts and attach the safety chains to the brackets. Place the last ball of the ball-chain into the bracket. With the Indow insert tilting slightly toward you, grab sides of the insert and gently bend the top of the insert toward the frame and press the top edge into the frame.
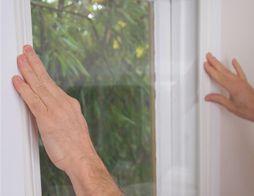
Work your way down the sides, pressing the compression tube into place. If there is no stop right behind the compression tube, make sure the sides are straight and not wavy.
Check Your Work
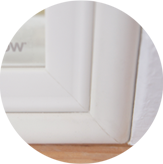
Make sure the Indow insert is straight and not tilting vertically or skewed horizontally in the frame.
Ensure the insert is sitting well in the frame – not overly compressed, nor any gaps or loose fitting areas. Pinch the tubing to make minor positioning adjustments.
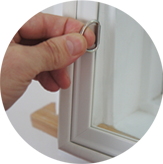
If you notice any gaps or overly compressed areas, remove the insert using the D-ring and reinstall fallowing the instructions above.
Peel remaining film from the front side of the insert and wipe clean with microfiber cleaning cloth (see cleaning note in step 6, or review Indow Care Guide). Visually check all Indow inserts for any defects – any defects should be reported to your representative immediately (see the Receiving & Handling Guide for what to look for, and how to report damage).