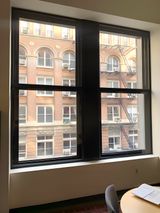
How To Measure Using Tape
Indow customers who opt for the Tape Measure Programdo so because they want to achieve comfort and quiet in their space as soon as possible. Get started today using the instructions below.
If we missed something let us know: 503.284.2260
Preparing to Measure
Remove any furniture around the windows for easy access and a more accurate measurement. If you have blinds that have to be removed, now is a good time. Get a piece of paper to write your measurements on, or you can download our Measure Form here.
Record:
Room and Location (as you want them to appear on the insert label)
Product Type (Standard Grade, Acoustic Grade, Film, etc.)
Frame Color
NOTE:
Measuring a lot of windows? Start with 3 or 4, then enter measurements into the Measure by Indow portal to make sure they are accepted before continuing.
Accessing Each Window
FRAME STEP & DEPTH
Frame Step is where your insert will be installed in your window frame. Frame Depth* is how deep your frame step is. For all dimensions, place the metal corner of your measuring tape into the corner of your frame step and measure straight across. Recording the step & depth on your Measure Form will help you measure and install in the same place.

Identify Frame Step
Some windows have more than one frame step, while other windows have just a single, flat surface. This example shows two frame steps. (1) in blue and (2) in yellow. For each window, you will be taking a set of 6 measurements which must be taken on the same frame step.
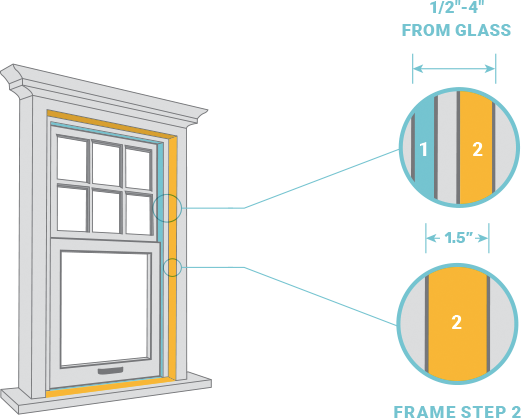
A COMPATIBLE FRAME STEP MUST HAVE:
5/8" of flat space (if measuring for Indow inserts)
(11/4" if blinds are installed at top of frame)
At least 1/2" of space from window glass
No obstructions such as shutters, shades. handles, cranks, or locks
NOTE:
For noise reduction, the best frame step is at least 1"-4" away from the window glass.
Measure Widths & Heights
A Width Top
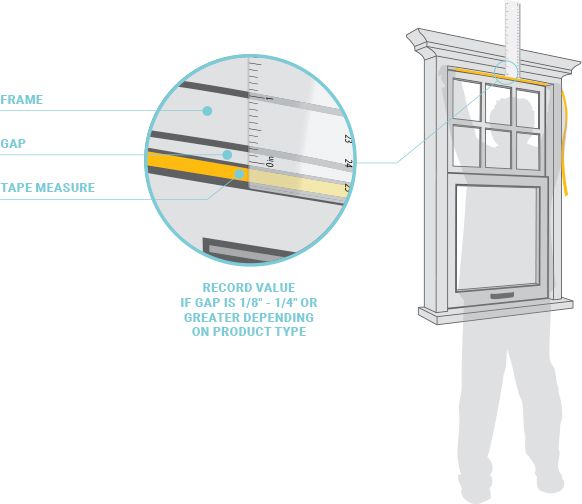
Locate the frame step the inserts will be installed on. Measure top left corner to the opposite (top right) side.
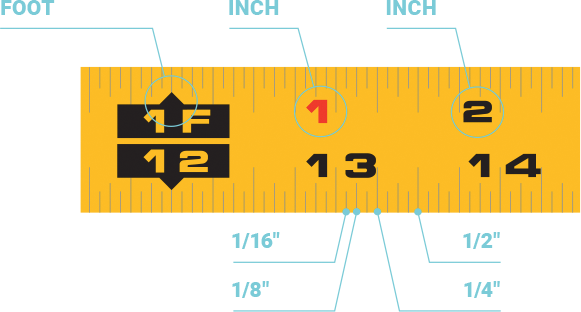
Write the measurement on your Measure Form under the column 'A Width Top'. Record the measurements in fraction. Measure Twice!
B Width Bottom
Use the same frame step as before. Measure from the bottom left corner of your window frame across to the right. Record your measurements under 'B Width Bottom' on the Measure Form.
C Height Left
Using the same frame step as before, measure from the bottom left of the window to the top of the frame's left side. Measure Twice! Write these measurements on your Measure Form under 'C Height Left'.
D Height Right
Now do the same height measurement from the bottom right to the top right of the window frame, inputting your measurements under 'D Height Right' on the Measure Form.
Measure Diagonals
E DIAGONAL LEFT
Place the measuring tape in the bottom left joint of the window and align the metal corner (if there is one) just outside of the frame step.
Measure Twice! Until you have at least two measurements within 1/16" of each other. Write the measurement under 'E Diagonal Left' on the Measure Form.
F Diagonal Right
Repeat instructions for E Diagonal Left, but with the measure tape going from the bottom right joint of the window frame to the top left joint. Write the measurement under 'F Diagonal Right' on the Measure Form. Try to keep the tape measure taut when measuring diagonals.
NOTE:
The joint is where the two sides of the window frame meet. When you measure from joint to opposite joint, still measure within the frame step where your insert will be installed. We recommend two people for larger windows.
Final Window Check
Any number of reasons can cause a frame to curve or bow over time. There are convex (outward) bows and concave (inward) bows. Checking for bows ensures your inserts will fit snugly within the frames.
CHECK FOR BOWS
Convex: Stretch a string, level, or other straight edge tool from corner to corner on one side. Pull it tight to see if there's a point where the string (or other tool) isn't touching the frame (see convex diagram). If you see a gap, the frame has an outward convex bow. Check all four sides of each window.
Concave: Stretch the string or other tool across the face of the frame to see if any points of the frame dip toward the window's interior or pass over the string or other tool (see concave diagram).
THIS WINDOW HAS AN OUTWARD OR CONVEX BOWED FRAME
THIS WINDOW HAS AN INWARD OR CONCAVE BOWED FRAME
Follow the directions below if you detect a gap thicker than a pencil tip. If you detect no bows, continue to the next step. To learn more watch our video on detecting bowed frames.
To measure the thickness of an inward or outward bow in a frame, tape both ends of the string to the corners so the string is taut, and use a ruler to measure the thickness of the bow where the gap is largest. Alternatively, someone can help measure the bow thickness while you hold the string taut. If the frame is bowed more than %" (the thickness of a pencil tip) record which side of the frame is bowed, the direction (inward or outward) and the bow thickness in the "Notes" section of the Measure Form.
Be sure to include where on the frame it's thickest and the start and stop location of the bow in inches. If the bow is on the bottom or top, provide the distance from the left where the gap is largest.
Example: The frame has a 9/32" thick inward gap on the left side, three inches from the bottom left hand corner of the sill.
Submit Measurements Online
Check your email for your Measure by Indow link to access the portal. Subject line includes "Measure by Indow". Once you're in, click Add Item > Measure Now and fill out all three dropdowns: "Label Insert", "Order Details", "Measure & Save" one at a time.
ORDER DETAILS
Notes: If you found bows, add description here. Include which side is bowed. the direction (inward/concave or outward/convex) as well as the thickness of the bow.
MEASURE & SAVE
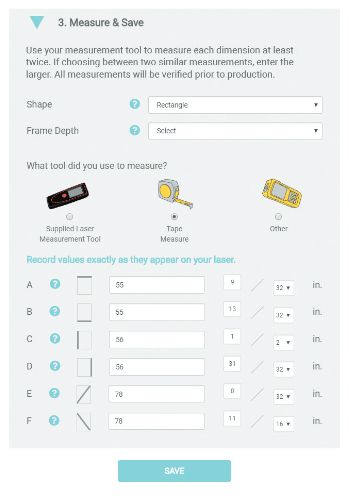
Shape: Select "Rectangle" unless you are working with a special shape such as an arch or octagon. For custom-shaped windows, please refer to the Custom Order Form. Enter all measurements as they appear on your Measure Form, selecting the larger measurement of the two within 1/16" of each other. Type the whole number in the field provided, the top number of the fraction in the field provided, and select the bottom part of the fraction from the dropdown. Do not enter any additional symbols or spaces.
See example:
REVIEW YOUR INFORMATION
Watch out for typos! If you are having trouble resolving any errors, select the "schedule a support call" option. If all errors are resolved, click "Submit Values". Once we receive your measurements, our team will recheck them. When the assessment is complete and any issues have been resolved, we'll send you a final invoice. You'll have a chance to review your order before making the final payment. If you feel any items in your order need attention, contact your Fit Specialist before you proceed. Once you confirm your order for the final time, you're finished!
