Terry W
5 Stars ⭐️⭐️⭐️⭐️⭐️
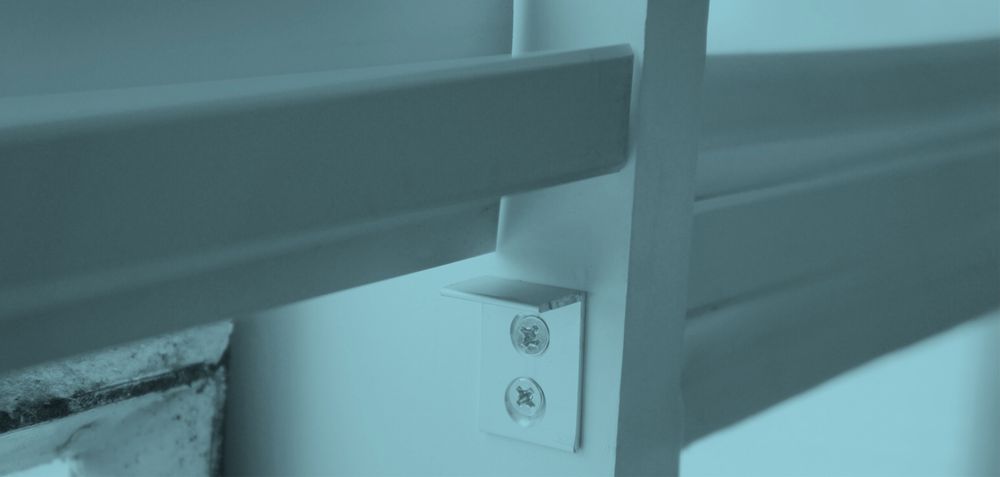
A mullion divides a window into smaller units. An Indow mullion comes in an ‘H’ profile to divide our window insert into more manageable units when needed. The acrylic inserts slide into the white space of the ‘H’.
Sometimes a specialty ‘F’ profile mullion is needed for windows that meet at an inside corner, like a fish tank. If this is the case for your windows, let us know so we can provide different instructions.
Your window, or the opening you’d like to seal, is too large for a standard Indow insert.
You will be installing & removing your insert often—for cleaning or opening your window.
You want to open part of your window while keeping part of the insert installed.
Your existing window has frame dividers & you want your insert to match.
The Indow Mullion comes in the same colors as our insert frames - white, brown, & black - but can be painted to match your window frame. The ‘F’ bar is only available in a “mill” finished aluminum.
‘H’ Bar
Mounting ‘L’ Brackets
Screws
Please let us know if you did not receive the mullion sample piece with the mountings brackets and screws.

NOTE: This guide includes instructions for installing brackets, measuring with only the brackets in place, and installation once inserts and mullion have been delivered. For alternate installation techniques or when using ‘F’ bars, you will need to completely install the bar and hardware before measuring.
2 ‘L’ brackets
2 Screws per bracket
Drill with 1/16" Drill Bit
#1 Phillips Bit Screwdriver
Pencil
Tape Measure
Laser Measuring Device
Determine placement of the window split. We recommend using an existing visual line, like a window frame, sash or divide, if present.
Measure from the bottom of the frame up to the point at which the mullion is desired and mark the frame with a pencil.**
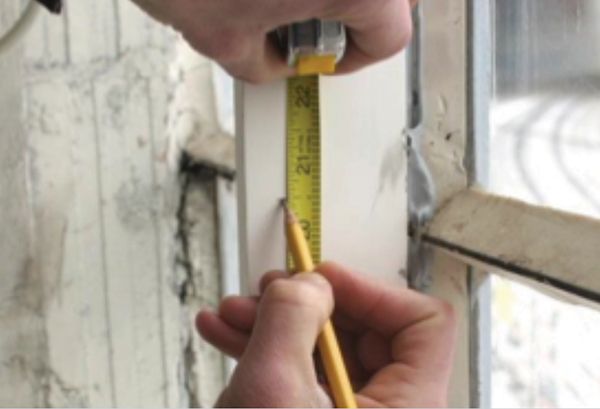
Repeat on the other side.
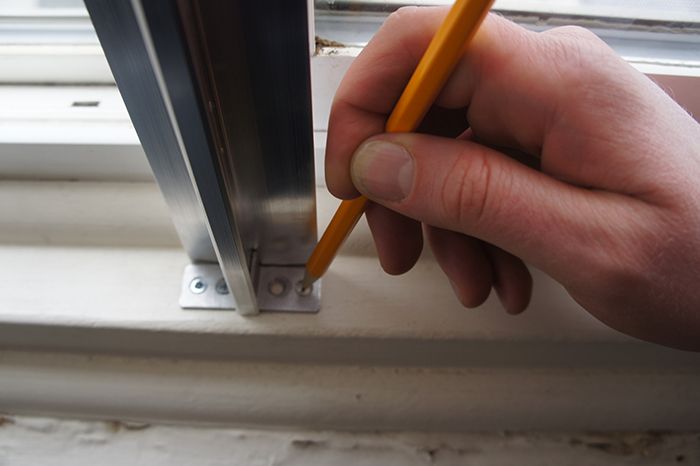
Position an ‘L’ bracket so that your pencil mark is at the TOP of the bracket and mark a center point for each counter sunk hole.
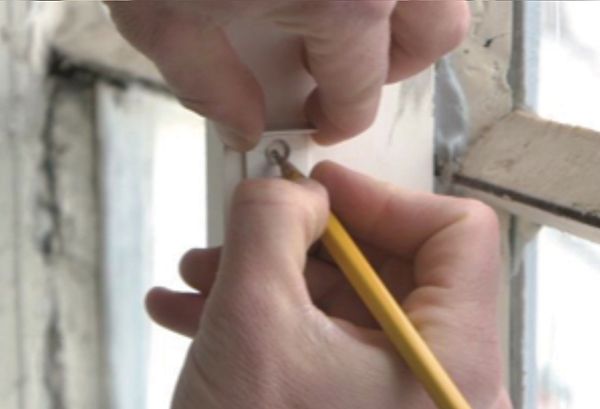
Repeat for the other side.
Pre-drill each marked center point.
Once holes are drilled on both sides, secure the ‘L’ brackets with the screws provided.
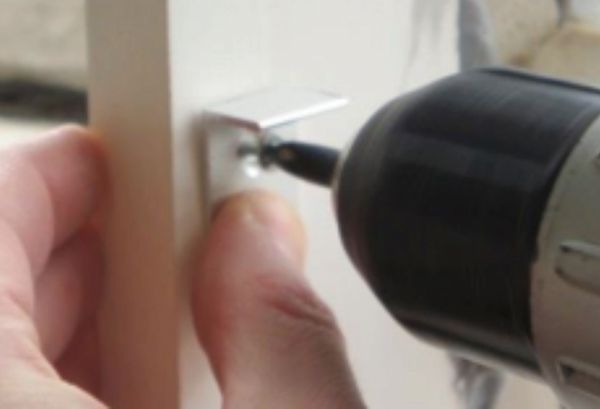
NOTE: MAKE SURE you position the bracket at the correct depth (& frame step) within the frame. If you aren’t sure what a frame step is, walk your fingers from the surface of your window out toward your wall. Every time you have to take a step with your finger, that’s a frame step.
“How to Measure Your Window for Mullions and Indow Inserts”

Follow the instructions included with your Laser Measure Kit to capture the six measurements for each opening.
When measuring the “A” value for the bottom panel, place the laser tool just below the ‘L’ bracket and shoot straight across the window frame.
The blue ‘L’ bar represents the Mounting ‘L’ Brackets
Double check your measurements. The ‘B’ value for the upper insert should be nearly the same as the ‘A’ value for the lower insert.
Enter all data into the Measure by Indow portal, check, and save.
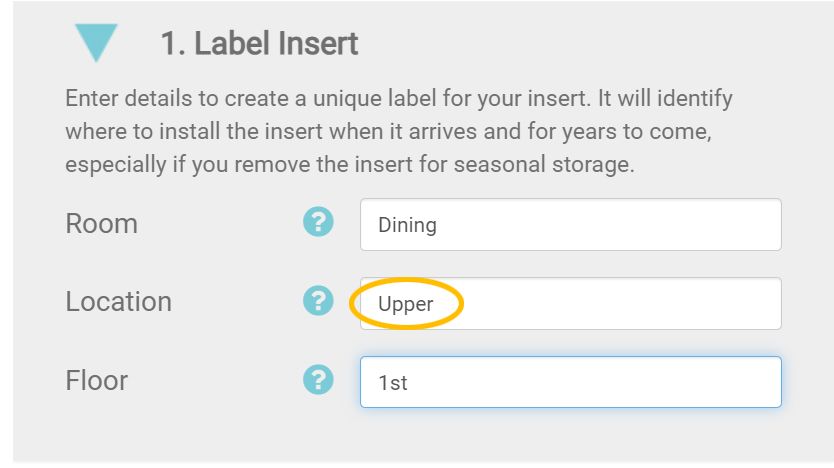
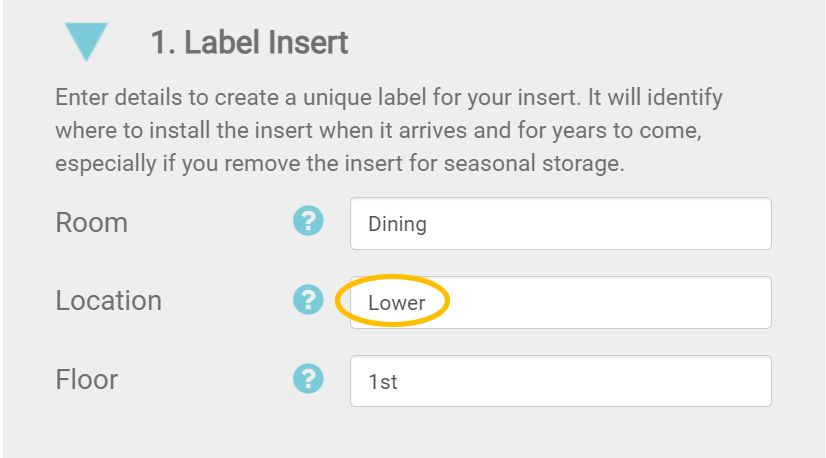
When entering your measure data into the Measure by Indow portal, designate UPPER” or “LOWER” in the Location field. This will be labeled on each insert so you know the correct location to install each panel.
Receive and un-package insert packaging.
If the mullion bar was not ordered pre-cut, you will need to measure the opening and cut it now.
Measure the distance across the frame at the specific location the mullion will be installed.
Measure and cut the aluminum bar using any saw with a metal-cutting blade.
Lay the mullion in place on top of the previously installed brackets.
Install the Indow inserts.
Install the TOP insert FIRST to compress the mullion down on top of the ‘L’ brackets.
When installing the bottom/lower insert, install the TOP of the panel first, so it nests in the channel of the mullion.
A vertical split is when the ‘H’ bar is on its side. Imagine the ‘H’ tipped over 90 degrees and both the inserts sliding in from the side.
4 ‘L’ Brackets
2 Screws per Bracket
Drill with 1/16” Drill Bit
#1 Phillips Bit Screwdriver
Pencil
Tape Measure
Laser Measuring Device
Mullion Sample (provided by Indow)

For a vertical installation, you will need to install two sets of ‘L’ brackets on either side of the mullion to hold it firmly in place.
Determine placement of the window split. We recommend using an existing visual line, like a window frame, sash or other divide, if available.
On the window frame header, measure from the left of the frame to the point at which the mullion divider is desired and mark the frame with a pencil.**
Repeat on the bottom of the window sill.
Position an ‘L’ bracket in the top of the frame so that your pencil mark is at the RIGHT of the bracket and mark a center point for each counter sunk hole.
Repeat on the bottom of the frame.
Pre-drill each marked center point.
Once holes are drilled on top and bottom, secure the ‘L’ brackets with the screws provided.
On the bottom of the window frame, place the mullion sample against the installed ‘L’ bracket.
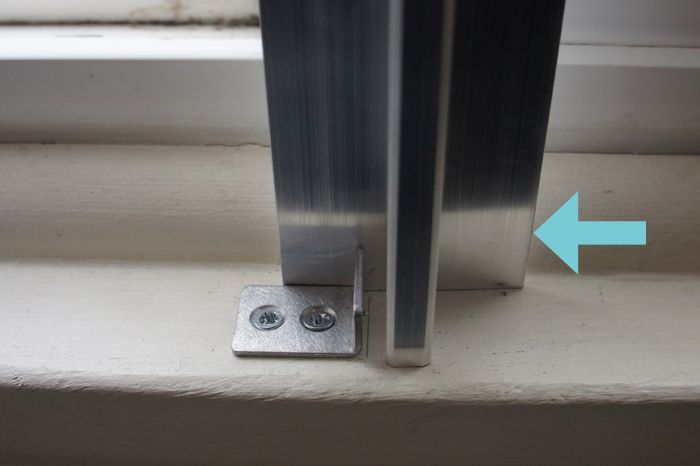
Place the other loose bracket inside the mullion channel and mark the location of the hole in the bracket.
Remove the mullion divider and pre-drill marked center point and secure ‘L’ bracket in place with the screws provided.
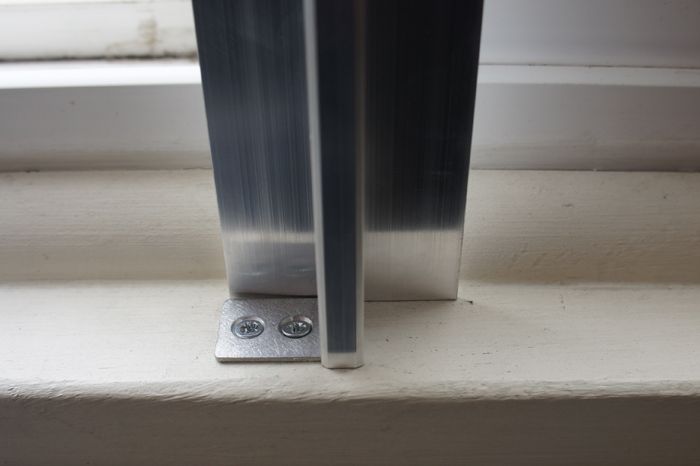
Repeat steps 8-10 for the top of the window frame.
**MAKE SURE you position the bracket at the correct depth or frame step within the frame.
Follow the instructions included with your Laser Measure Kit to capture the six measurements for each opening.
When measuring the ‘D’ value of the left panel and the ‘C’ value of the right panel, ensure your laser tool is flush against the window frame, not resting on the ‘L’ bracket, and shooting straight up to the top of the window frame. These values should nearly be the same.
Enter all data into the Measure by Indow (MBI) portal.
When entering your measure data into the MBI portal, designate “LEFT” or “RIGHT” in the Location field. This will be labeled on each insert so you know the correct location to install each panel.
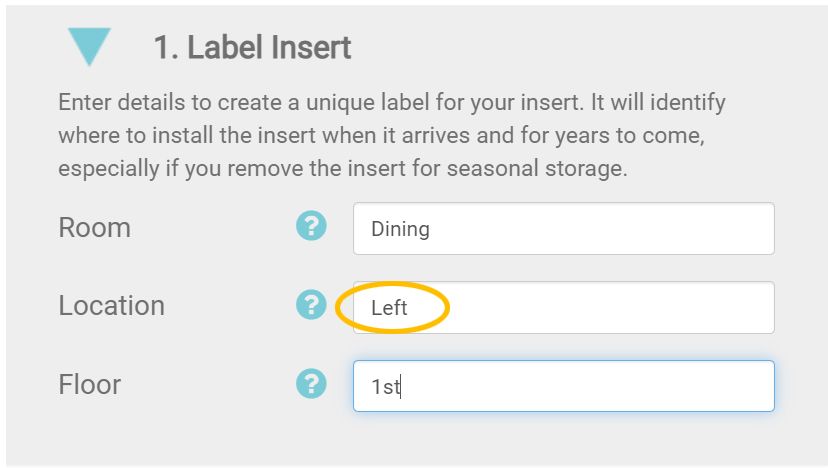
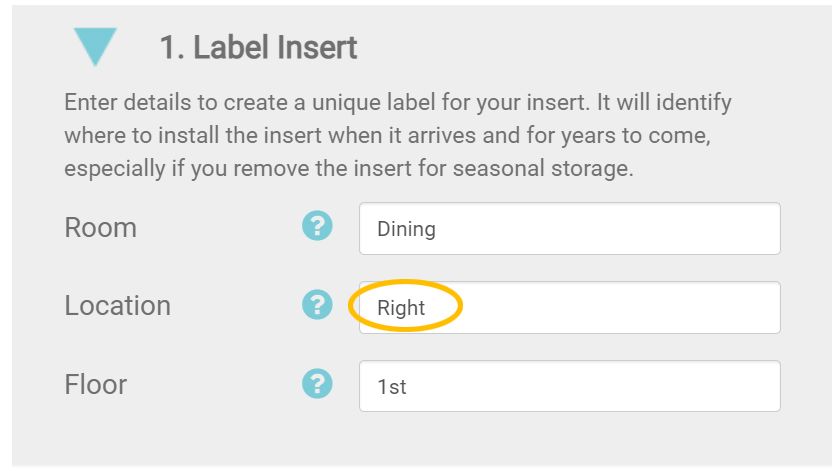
If you have a large window opening requiring 2+ mullion bars, you will need to place additional brackets in the window, in the places you wish to install the mullions. Where you measure from will be important as it can impact the outcome of your inserts. Here is a diagram illustrating our recommended measurements in a 3 panel split:
Heights measured on the frame, next to the brackets.
Diagonals from the bracket to the frame.
Widths from the bracket to the frame.
Downward diagonals, from the bracket to the frame.
Heights measured on the frame, next to the brackets.
Widths from bracket to bracket.
Diagonals measured from ‘L’ brackets into ‘L’ brackets.
Once you’ve received your inserts and mullion bar, unpackage the panels to identify which should be installed to the left of the mullion and which should be installed to the right.
If the mullion bar was not ordered pre-cut, measure and cut it now.
Measure the distance across the frame at the specific location the mullion will be installed.
Apply that measurement to the aluminum bar. Cut it with any saw with a metal-cutting blade.
Place the ‘H’ bar against the previously installed brackets so one set of brackets is nested in the ‘H’ channel.
Position the second top bracket so the pre-drilled hole is properly aligned, and secure into place.
Repeat on the bottom.
Install the Indow inserts, taking care to install the side that will be nested in the mullion first.
For alternate installation techniques or different mullion profiles, you will need to completely install the bar and hardware before measuring.
Request a Free Estimate. We'll provide you with a preliminary estimate based on your basic window dimensions. It's quick and easy!
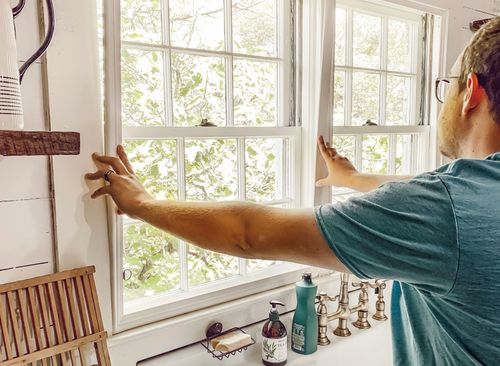
Measure your windows with our easy-to-use laser measurement kit. We'll guide you through the simple process, ensuring a perfect fit.
Customize your inserts to match your needs and your aesthetic, with tubing colors that seamlessly blend into your space.
Transform your space with custom-crafted inserts shipped directly to your home, ready to fit perfectly in your windows.
We value safety and privacy. We will never share, sell, or rent your data to third parties not directly related to your purchase or consideration of our products. Read our full policy here.
Indow has insulated more than 23,000 buildings - helping reduce carbon emissions by nearly 200,000 tons - and creating comfort across the US & Canada!
The indow window company and their staff are great Partners in battling the cold winter drafts coming through your windows and helps keep your home warm and cozy.. Wonderful company and great customer service..